
.png)
Automations
Business Tools
Client Experience
How to Automatically Send Google Calendar Invites for Dubsado Appointments
If you've ever thought to yourself 'Ugh, I wish I could just automatically send a calendar invite for my Dubsado appointments like you can with Calendly'—this one's for you!
Have you ever wanted to automatically send Google Calendar invites to someone when they schedule an appointment with you through Dubsado?
Well now you can! I’m sharing the exact Zapier template that I use to accomplish this in my business so that you can easily duplicate it to your Zapier account and get it set up in no time. This template functions by searching your Inbox to find an email that matches specific search criteria, finding the matching event on your Google Calendar, and then adding an attendee to the event.
First things first, there are a couple of platforms that you’ll need in order for this Zap to work:
- Dubsado Premier Plan ($40/month or $400/year) - If you’re not already familiar with Dubsado, it’s a platform that allows you to receive inquiries, send contracts & invoices, schedule calls, send proposals & questionnaires—all in one place. You can get 30% off your first year of Dubsado if you’re a new user!
- Zapier Starter Plan ($29.99/month or $239.88/year) - As an automation-junkie, I love using Zapier to connect platforms that I use that don’t natively work together. It saves so much time and helps streamline many of my processes from 1:1 clients to product purchases.
- A Gmail Account - You don’t need to have a Google Workspace account for this Zap to work, it can be a plain old Gmail account, but you do need to be utilizing the same Google Calendar account as the email that’s connected to your Dubsado account.
Here are the steps to follow to add this zap template to your account and set it up!
An important note first: If you use the 'Notes' section (pictured below) in your Dubsado projects, I don't recommend setting up this zap. When creating events on your calendar, Dubsado automatically includes some of your clients information in the call details such as their name, company name, address, invoice link, etc. and any notes you've added to their project. It's just not a professional look and can be confusing to clients if they're seeing that in the event details for your call, so I would recommend either taking notes elsewhere, or opting not to set up this zap!
Step 1: Setup your Zapier account
Before you get started, you’ll want to make sure that you have:
- A Dubsado account on the Premier Plan (you can’t use the call scheduler on the Starter Plan, so this would be irrelevant to you without the Premier Plan)
- Connected your email & calendar to Dubsado (with the same Gmail account)
- And signed up for a Zapier Starter Plan
Once you’ve done all of those, you’re ready to get started! Before you add my zap template to your account, you’ll want to go ahead and connect the necessary Apps to your Zapier account. You’ll do that by clicking ‘Apps’ under the navigation on the left-hand side of your screen (pictured below):
.png)
From here, you’ll need to follow Zapier’s instructions to add 2 apps:
- Gmail
- Google Calendar
Once you’ve connected those Apps to your Zapier account, move on to Step 2!
Step 2: Schedule a test appointment
Use one of your Dubsado scheduler templates & your personal email (this part is important!) to schedule a call with yourself.
Step 3: Add the Zap template to your account
To make this process as simple as possible, I’ve created a template for this zap which you can add right to your Zapier account!
Once you’ve added the template, now it’s time to make sure we get your settings right in order for the zap to work properly.
Step 4: Setup the Zap Trigger
The settings for the first step of the zap, the trigger, should look like this:
1. App & Event: Gmail - New Email Matching Search

2. Account: The Gmail account you connected
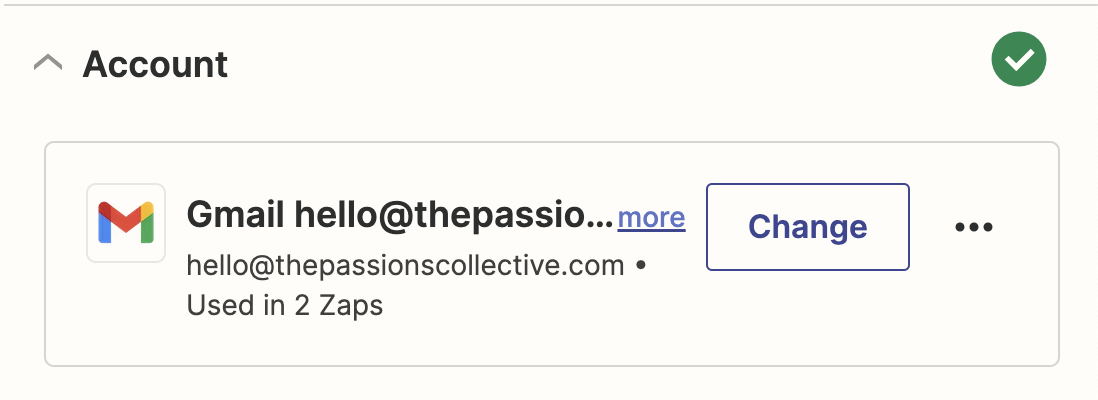
3. Trigger: Search String: in:inbox subject: your appointment has been confirmed
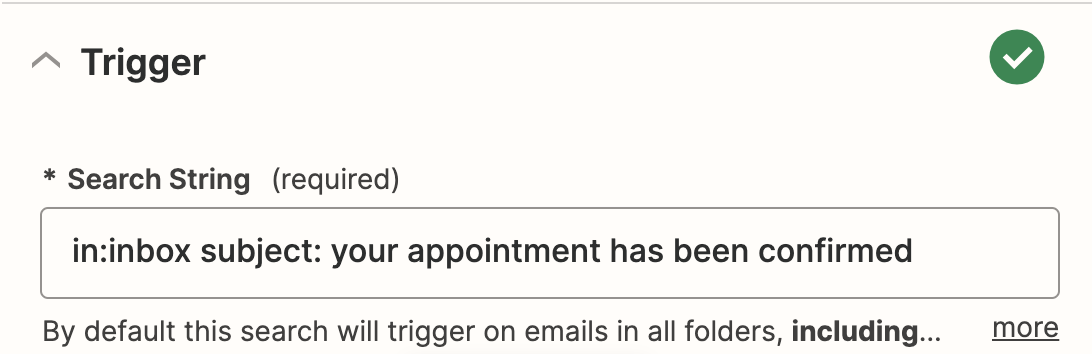
Once you’ve correctly set up this step, you can run a test and the test should successfully find an email from Dubsado relating to an appointment that has been scheduled. Select the one that matches the test appointment you scheduled with yourself!
Step 5: Setup the First Zap Action
The settings for the second step of the zap, the first action, should look like this:
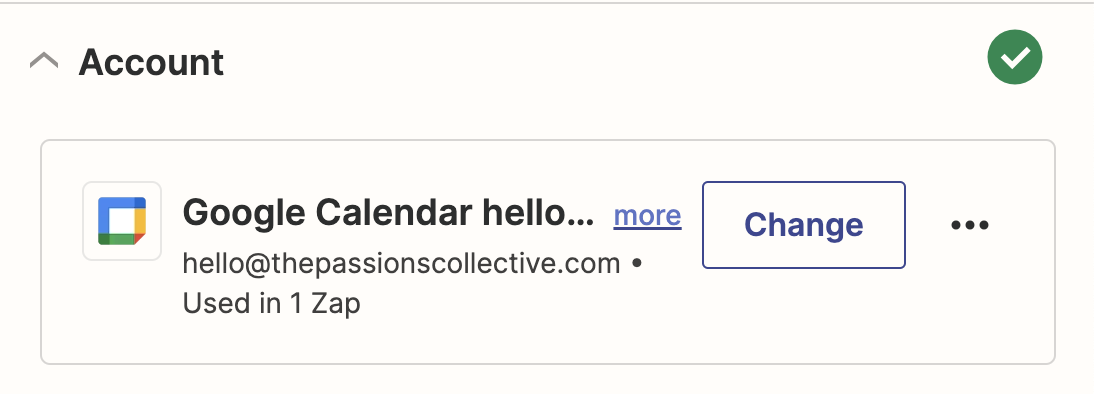
1. App & Event: Google Calendar - Find Event
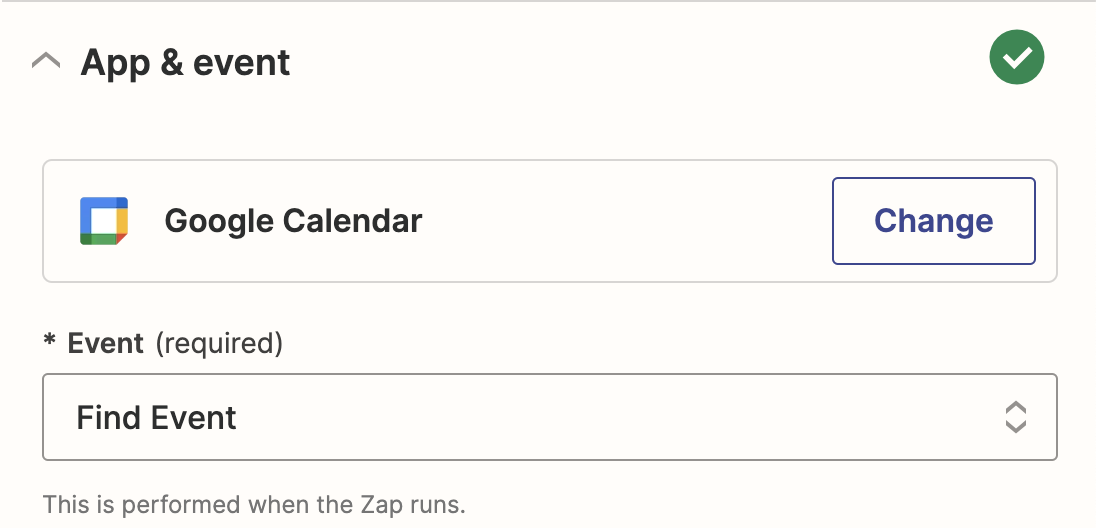
2. Account: The Google Calendar account you connected. Remember, this needs to be the same email that your Dubsado calendar is connected to!
3. Trigger: Calendar: the calendar that your scheduled calls are added to
Search Term: The reply to email
End Time After: The date
Should this step be considered a “success” when nothing is found? No.
There is also a checkbox at the very bottom of these settings which says “Create Google Calendar Event if it doesn’t exist yet?” and you want to make sure this remains unchecked.
.png)

Once you’ve correctly set up this step, you can run a test and the test should find the event on your Google calendar that matches the test call that you scheduled.
Step 6: Setup the Second Zap Action
The settings for the third step of the zap, the second action, should look like this:
1. App & Event: Google Calendar - Add Attendee/s to Event
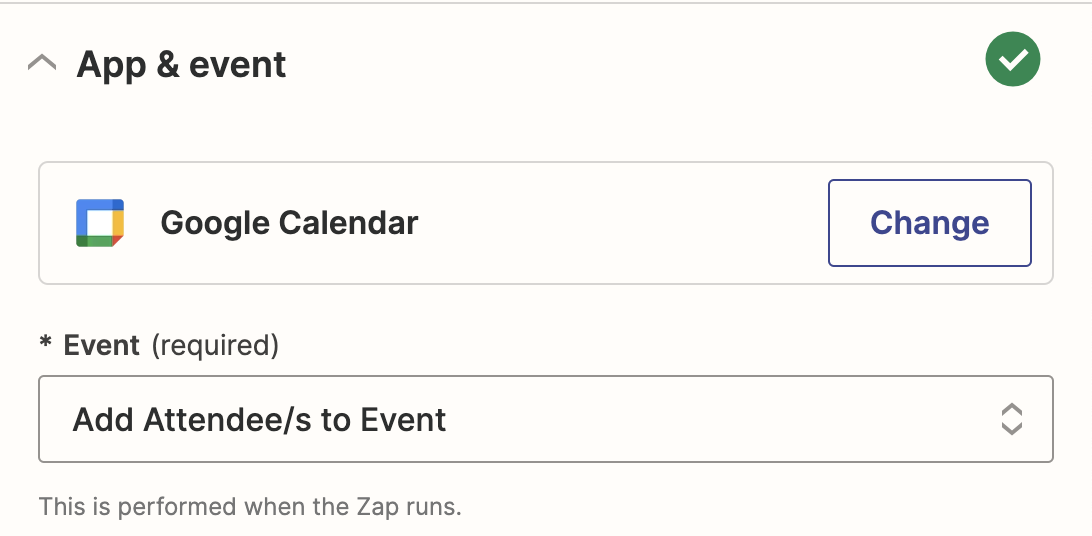
2. Account: The Google Calendar account you used in the previous step.

3. Trigger: Calendar: the calendar that your scheduled calls are added to
Event: This is going to be a Custom field which will allow you to select the Event ID from the previous step of the Zap. Follow these steps to select it!
Attendee/s: The Reply to email
.png)
Once you’ve correctly set up this step, you can run a test and the test should send a calendar invite to your personal email to the event that Dubsado automatically created on your calendar!
What happens if the call gets canceled or rescheduled?
Great question! If a call is rescheduled in Dubsado, the calendar event is automatically updated and your attendee will automatically receive an updated invite.
If your call is canceled in Dubsado, this does not automatically remove the event from your calendar, however, the title of the event changes to display [CANCELED] in front & your client would still get an automatic email from Dubsado if a call is canceled.
P.S. Make sure you're editing your Default Email Templates in Dubsado so that they're on brand and so that, in your confirmation email, you can let people know that they should receive a calendar invite shortly! I still recommend keeping the 'add to calendar' Smart Field in your confirmation emails, just in case someone wants to add it to a different account than the email that they scheduled the call with.
Want more automation tips to make your life (and your clients’) easier?
Check out my free Dubsado inquiry workflow, which includes 3 customizable email templates and a video walkthrough of the setup process. Or subscribe to Fridays with Fran; my weekly email newsletter where I share client experience tips, personal anecdotes, and the occasional cat photo. Or book a Client Experience Audit with me where I take a deep dive into your business to give you a big-picture overview of what’s working and what’s not, plus actionable next steps for how to improve!

popular categories


Want to give your leads a great first impression?
Start off on the right foot (digitally!) with my free, customizable Dubsado inquiry workflow. Plus, you also get 4 editable email templates to plug into your workflow and a video walkthrough to help you set it all up!

